This 3D CAD tutorial is based on the author's rich experience in kitchen and bathroom design. I will share with you the 3D easy to draw CAD box model. Hanging code is a cabinet accessory that furniture industry designers often come into contact with. Through the hybrid modeling core of Zhongwang 3D, it can realize the free interaction between solid and curved surface in CAD design, thus ensuring the CAD design of hanging code with half the effort. At the same time, Zhongwang 3D's unique "learning by side" function enables beginners to quickly master the design essentials of 3D CAD software. This is also an important reason why the author can quickly apply to actual CAD design after contacting 3D. Next, I will introduce you to the specific 3D CAD design ideas:
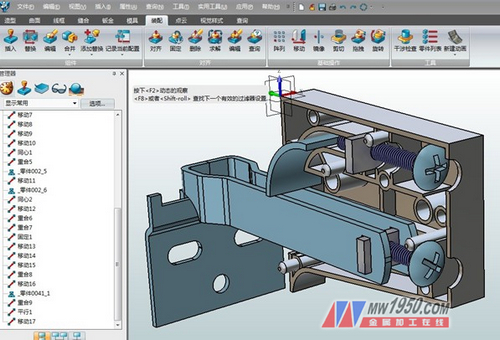
figure 1
1. Start the 3D program, click on the part/assembly, name the hanging code box, and create a new file.
2. Click “Insert Sketch†on the basic modeling toolbar and click OK in the left manager window to enter the default XY coordinate working interface (XY coordinate plane).
3. Use the straight line and arc commands of the sketch toolbar to draw the sketch line of the outer shape of the hanging code box, then click the label in the labeling toolbar, and use the size driving technology to precisely adjust to the required size and shape. 2), then exit the sketch. Here, it should be noted that the use of size drive technology, sometimes caused by the entire or partial sketch line tilt, deformation and other issues, how to solve it? This requires the "fixed" series of commands in the 3D Constraint Toolbar. Just fix a few lines or circles or points that have already been determined, and look at the 3D constraint fixed function in complex drawing situations. Very practical.
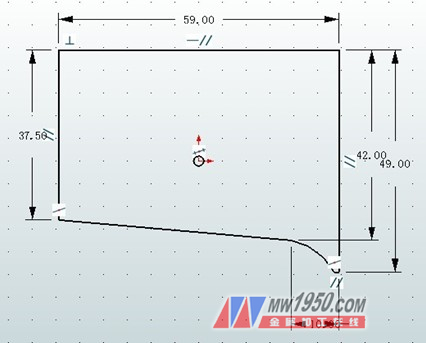
figure 2
4. Click the Stretch command on the basic modeling toolbar, select the sketch box sketch line, enter the corresponding parameter values ​​in the manager window on the left, and click OK to stretch the solid (base) model. (image 3).
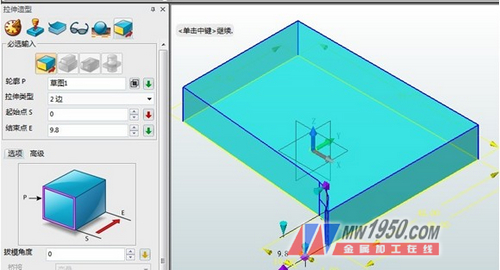
image 3
5. Click Insert Sketch again to illuminate the surface of the code box entity (base) model and click OK to enter the sketch interface.
6. Click the “Reference Geometry†command on the toolbar, click the left mouse button to select the outer contour of the hanging box entity (base) model as the drawing reference, and then click the “circle†command on the sketch toolbar to draw the sketch circle. According to the above-mentioned outline driving technology, the position and diameter of each circle are precisely adjusted and constrained and fixed. Then use the Line, Arc, and Offset commands to draw an internal structure sketch with the outer dimensions along the outline and the circle, and the size drive precisely adjusts the position of the sketch line.
In the Modify toolbar, use the Click Trim and Stretch Trim commands to trim the extra sketch lines or extend the sketch lines. The result is shown in Figure 4. Need to be reminded that so many sketch lines must be connected accurately and closed, and must not be "leaked", otherwise it will affect the next physical modeling, and become a surface modeling, this should be noted. Then exit the sketch and proceed to the next modeling process.
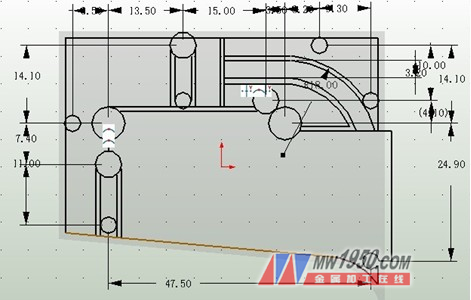
Figure 4
7. Click the "Stretch" command to light the sketch line. In the left manager window, check "Subtract" and click the "Select Outline Area" button. Then the left mouse button lights up in the solid model and needs to be stretched. Face, then click OK to return, enter the corresponding parameter values ​​in the left manager window with reference to the following figure, click OK to form a hollowed out solid model (Figure 5). Here, we should emphasize the use of the "select contour area". When the sketch lines are complicated and form a plurality of different areas, some surfaces need to be stretched, and some surfaces do not need to be stretched. What should I do? This uses the “Select Outline Area†function of Zhongwang 3D, just light up the surface that needs to be stretched. In addition, Zhongwang 3D's “subtraction operation†has the same function as Zhongwang CAD “difference setâ€, but the name is different.
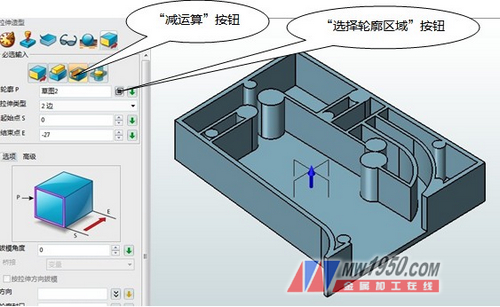
Figure 5
8. Click the "Cylinder" command of the basic modeling, move the cursor to the plane of the solid model click circle, click the right mouse button to bring up the dialog box, click "Curve Center", and then click the circle outline again to automatically capture the circle. Center, then check "Add operation" in the manager window on the left, refer to the following figure to enter the corresponding parameter values, click OK, the result is shown in Figure 6.
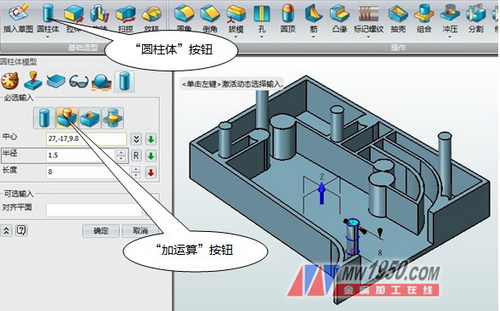
Image 6
9. Click the "hole" command on the action toolbar, click on the solid model plane, gently move the mouse to automatically capture the center point of the circle, click the left mouse button, and in the option window of the hole on the left side Refer to the figure below to enter the corresponding parameter values, click OK, and the result is as shown in (Figure 7).
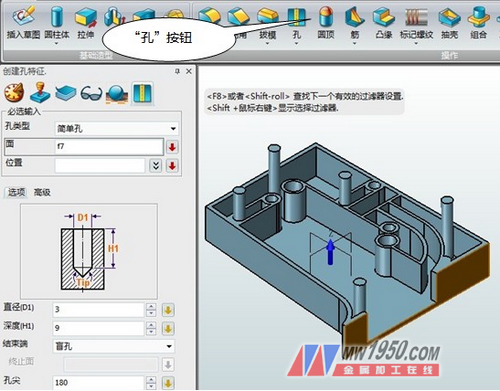
Figure 7
10. Finally, click the Fillet command on the Actions toolbar to round the cylinder. The physical model of the hanging code box can be completed, and the effect is shown in Fig. 8.
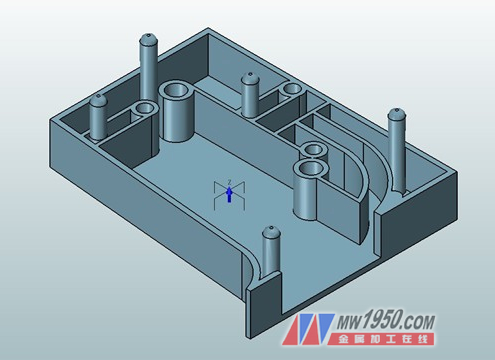
Figure 8
Welcome friends to try out the 3D CAD model of the hanging code box with Zhongwang 3D, and experience the 3D efficient hybrid modeling CAD design of Zhongwang 3D. Also welcome the furniture industry designers to the Zhongwang technology community ( Jishushequ)'s 3D CAD communication area, sharing the 3D CAD design concepts and techniques of the AC furniture industry.
H14 Check Valve,Ball Check Valve,Quiet Check Valve,Swing Type Check Valve
Wenzhou Dico Valve Technology Co.,Ltd. , https://www.dicovalves.com